For information on how to make your images suitable for site use, view our Knowledge Base Article on image optimisation and compression.
Uploading Images
To upload images, login to the Tyres and Service admin and go to the 'Design' Tab and then click on 'Image Library'. From there, click the "Manage _____" button depending on whether
you wish to change the logo, banner, background or manage the other content images for your website (these can be used on any editable page). (see image below).

Your Logo
To edit your logo library click the 'Manage Logos' button.

To upload your logo, click the 'Upload a File' button.
Note: Aim to set your to logo to conform to the following image dimensions: 288px by 85px
Once your logo has been uploaded, to select it, click on the image and then click the 'Set as Logo' button.

You will know the image has been selected when the green banner appears above the image.

Your logo will appear at the top left corner of your website as shown below.

Your Banners
To edit your banners, click on the 'Manage Banners' button.
This then brings you to all your available banners. You have stock banners, my banners, promotional banner and my promotional banners. In this example we are going to add a new banner to the my banners section.
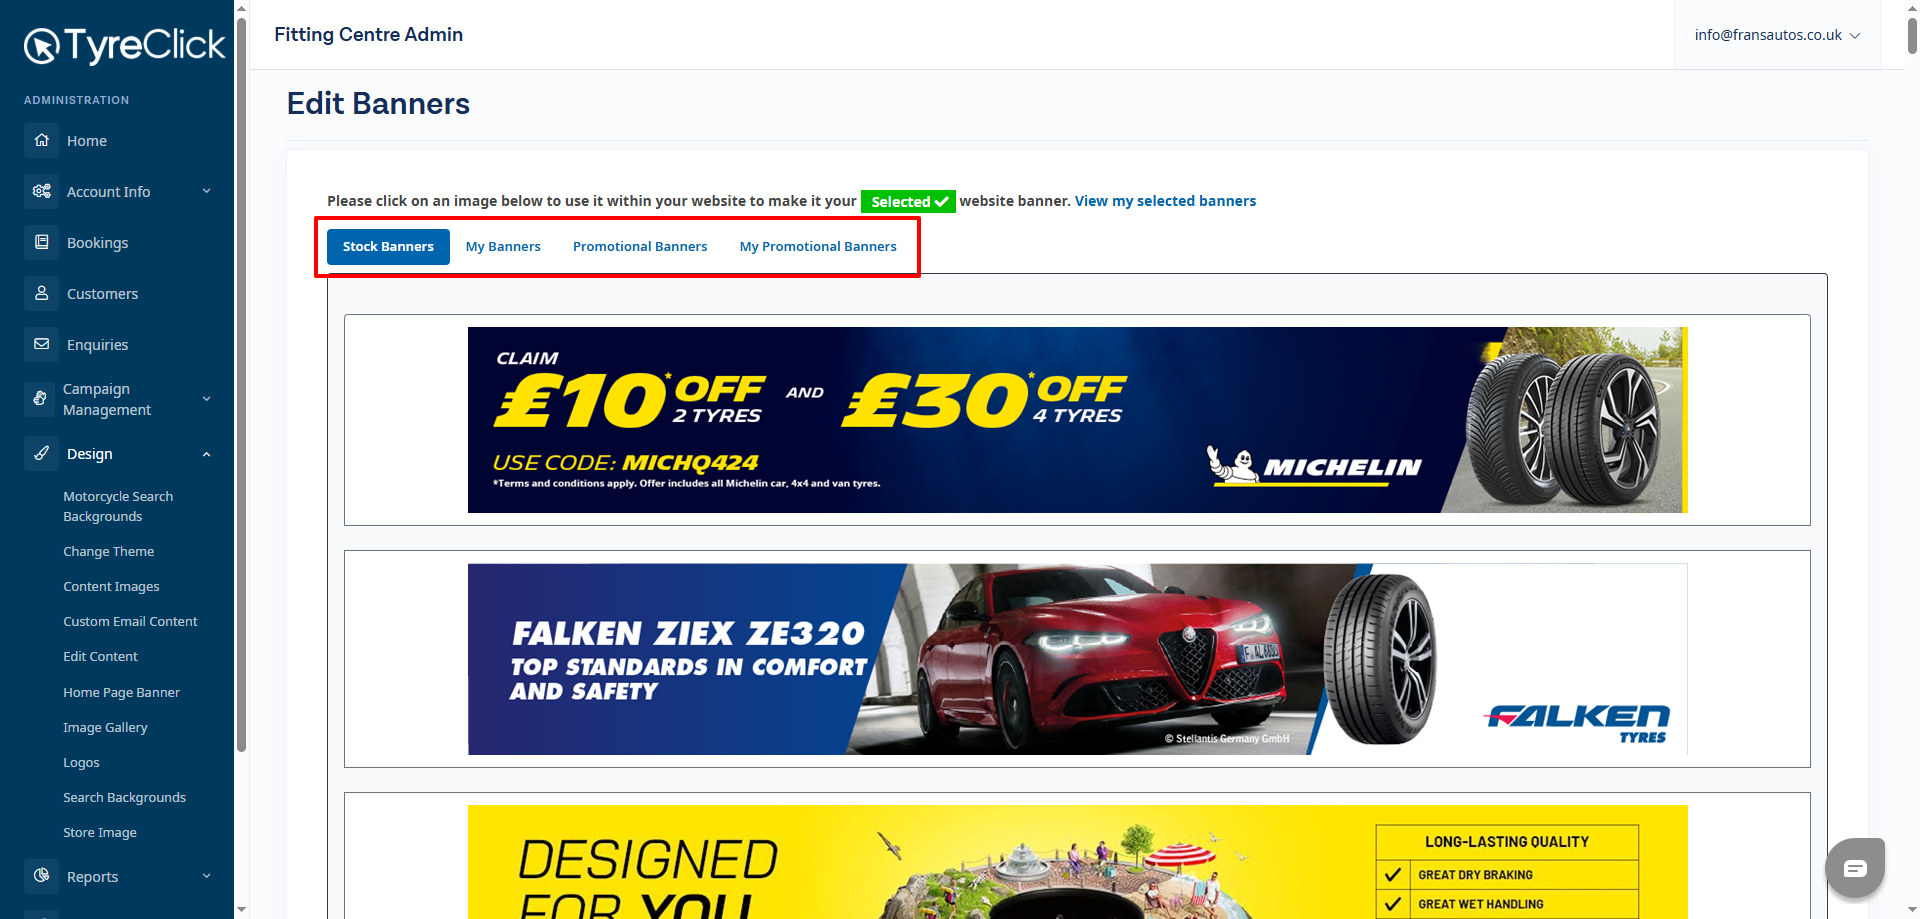
To upload your banner, click the 'Upload a File' button.
Note: Aim to set your to banner to conform to the following image dimensions: 1250px by 195px
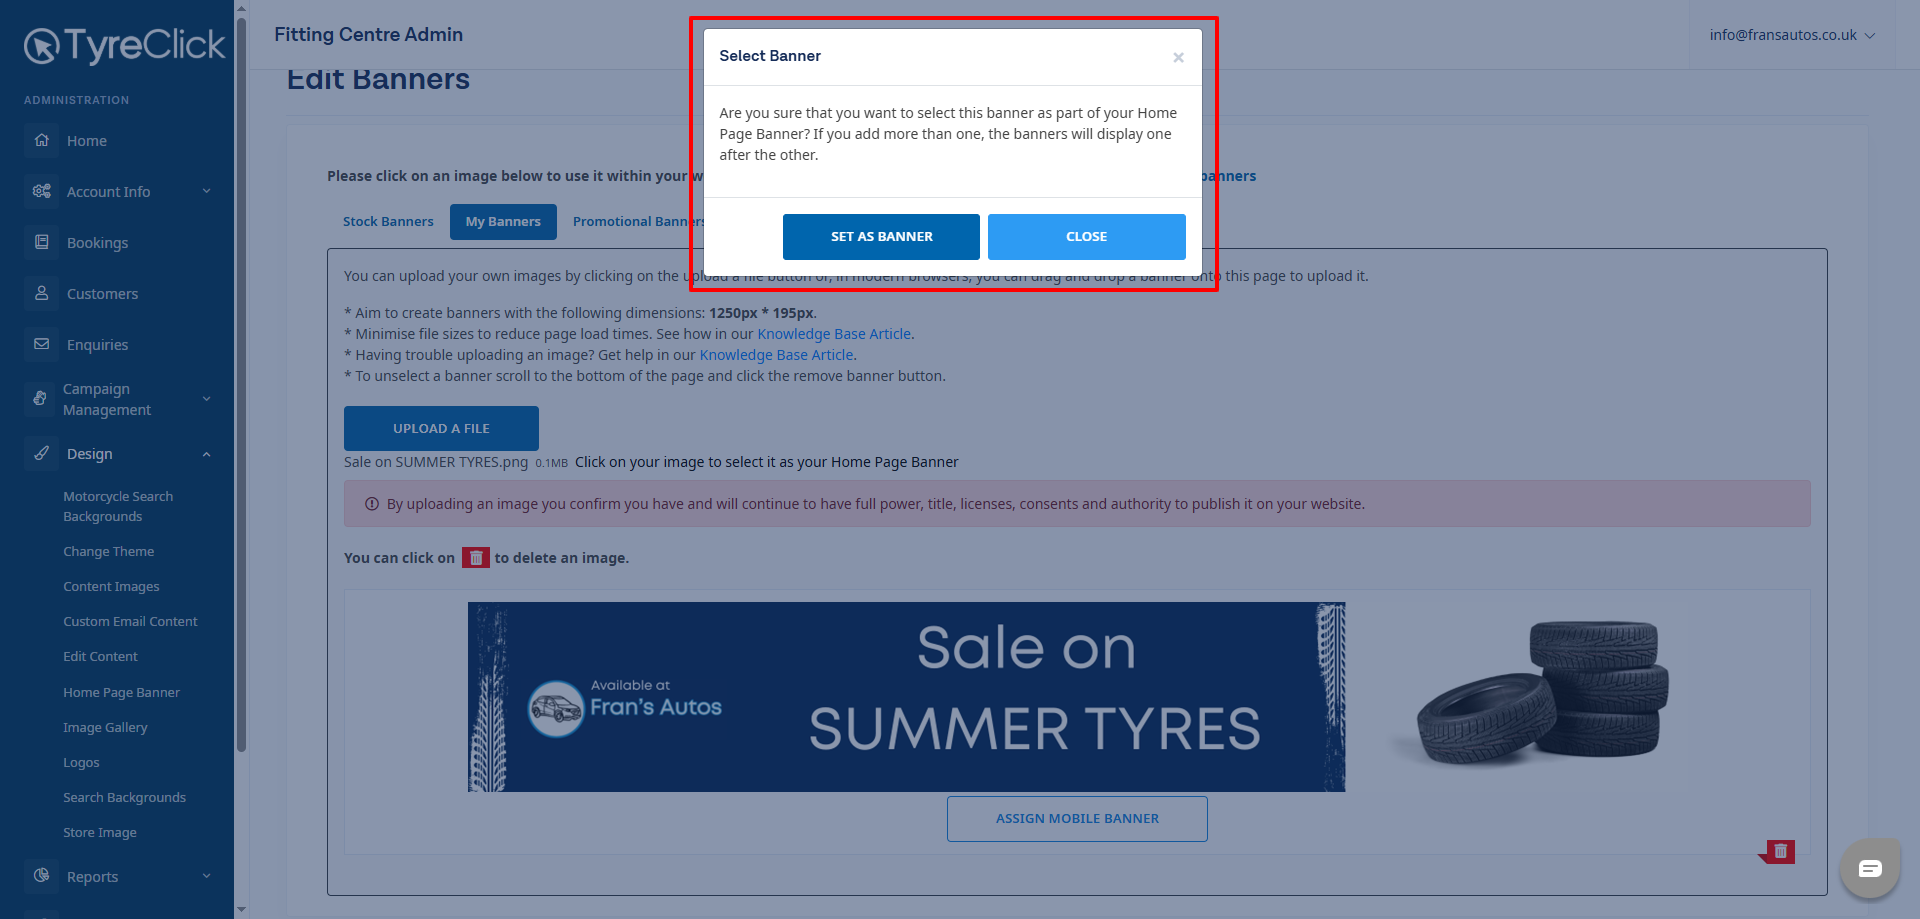
Once your banner has been uploaded, to select it, click on the image and then click the 'Set as banner' button.
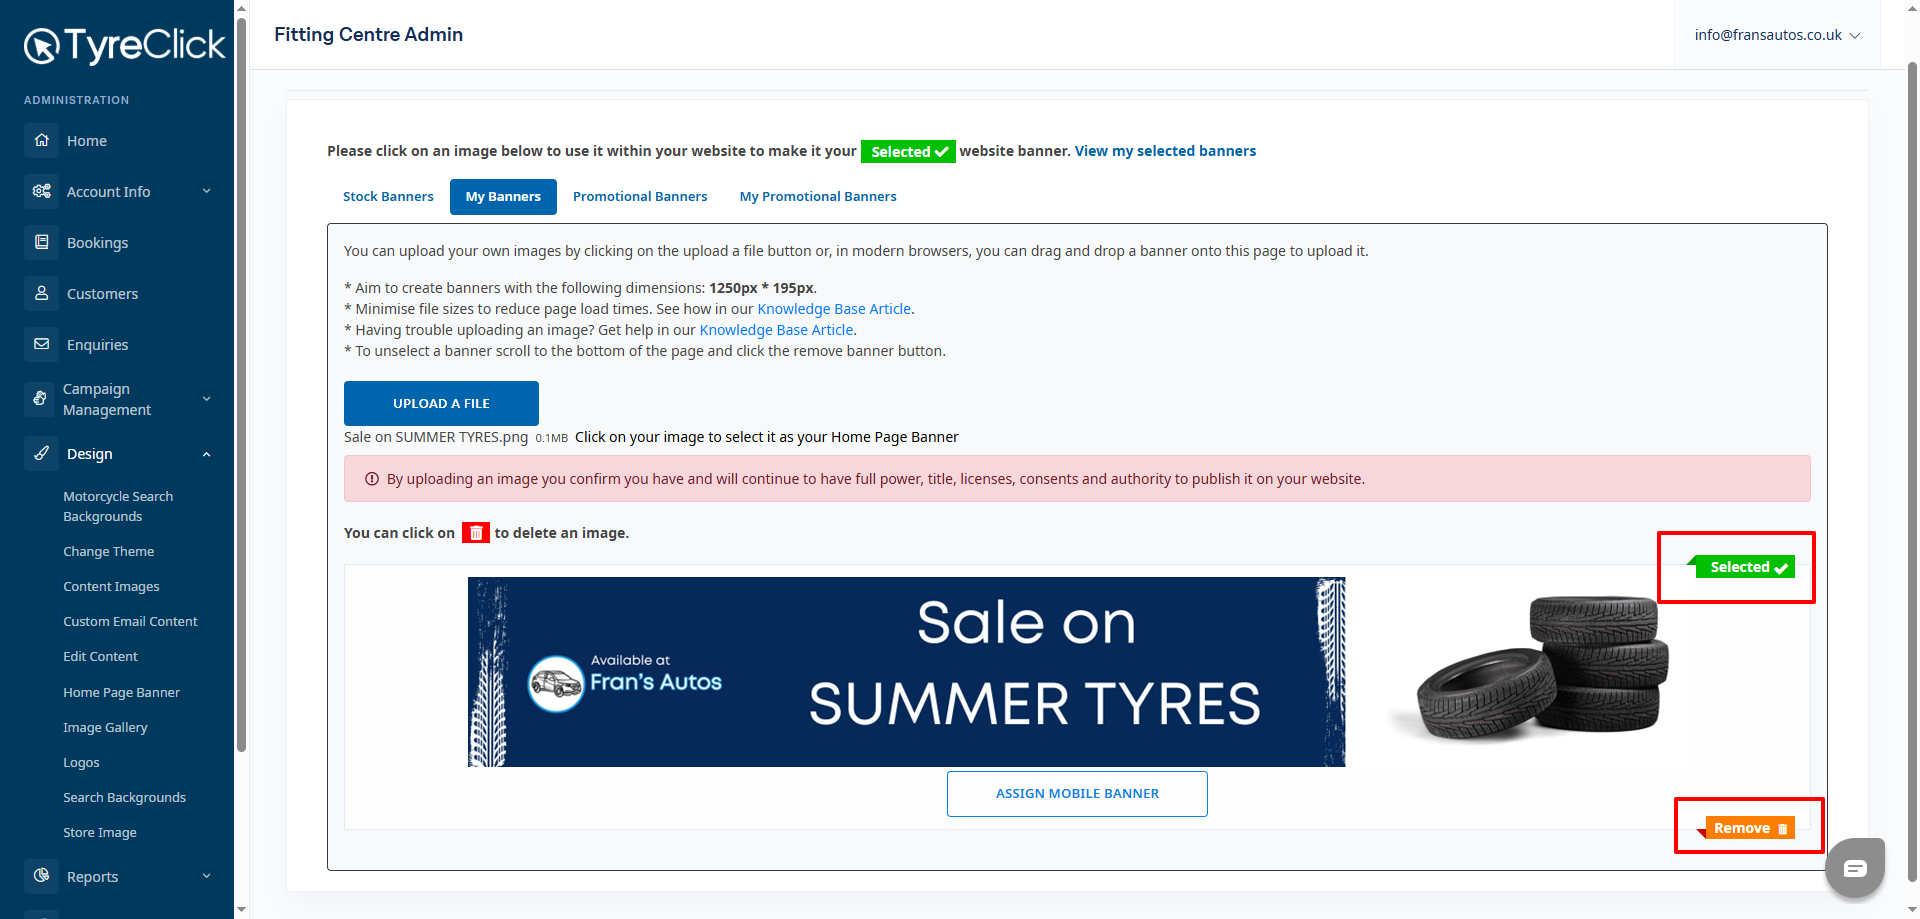
When you have selected the banner, it will have a green tag at the end to indicate that the banner has been selected.
To remove the banner, click the orange remove button as seen below.
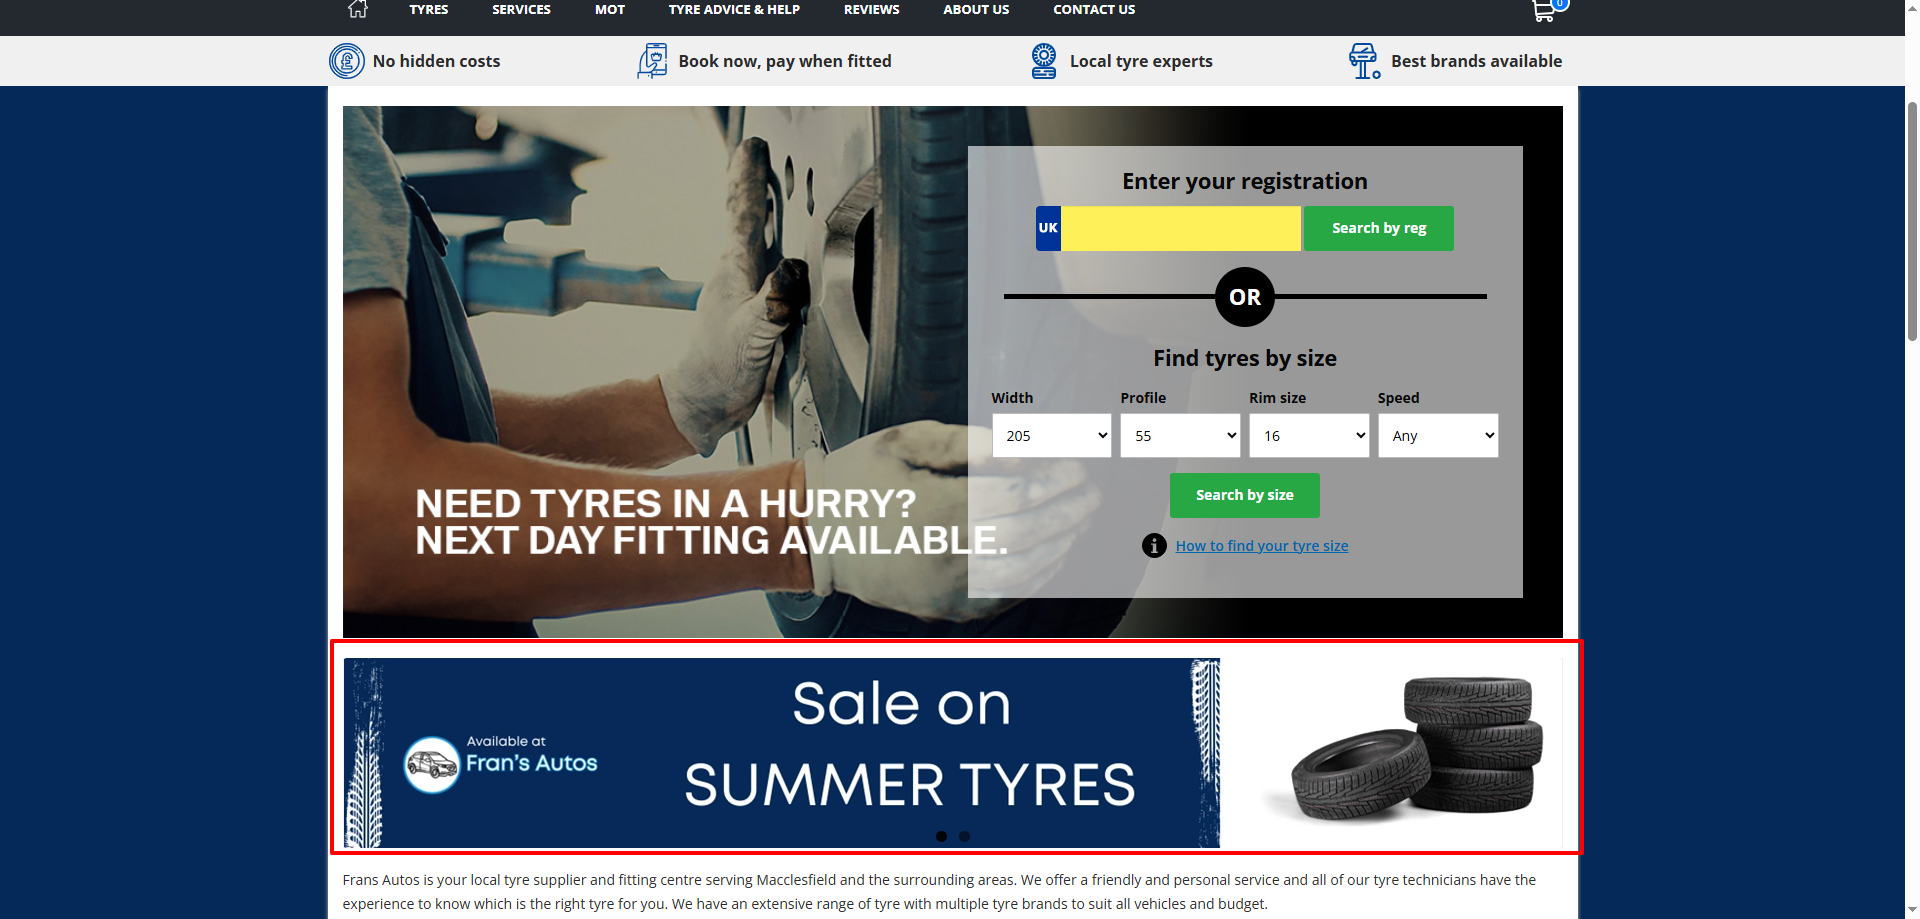
You banner will then show on your homepage as shown below.